Apple Shortcut for blogging
Yesterday I posted my first blog via an Apple Shortcuts trigger and GitHub Actions workflow. Today, I’ll break down how I wired all of this up.
Brief backstory on Apple Shortcuts. Shorcuts started on iOS and has now expanded to MacOS. Essentially it’s a GUI which allows for drag-and-drop automations and workflows. You can do myriad things like adding a reminder or calendar event, updating a note with new information, resize an image, or like in our case here, preload a markdown file with our Hugo post data and fire up an editor based upon which Apple device you’re using. Pretty cool!
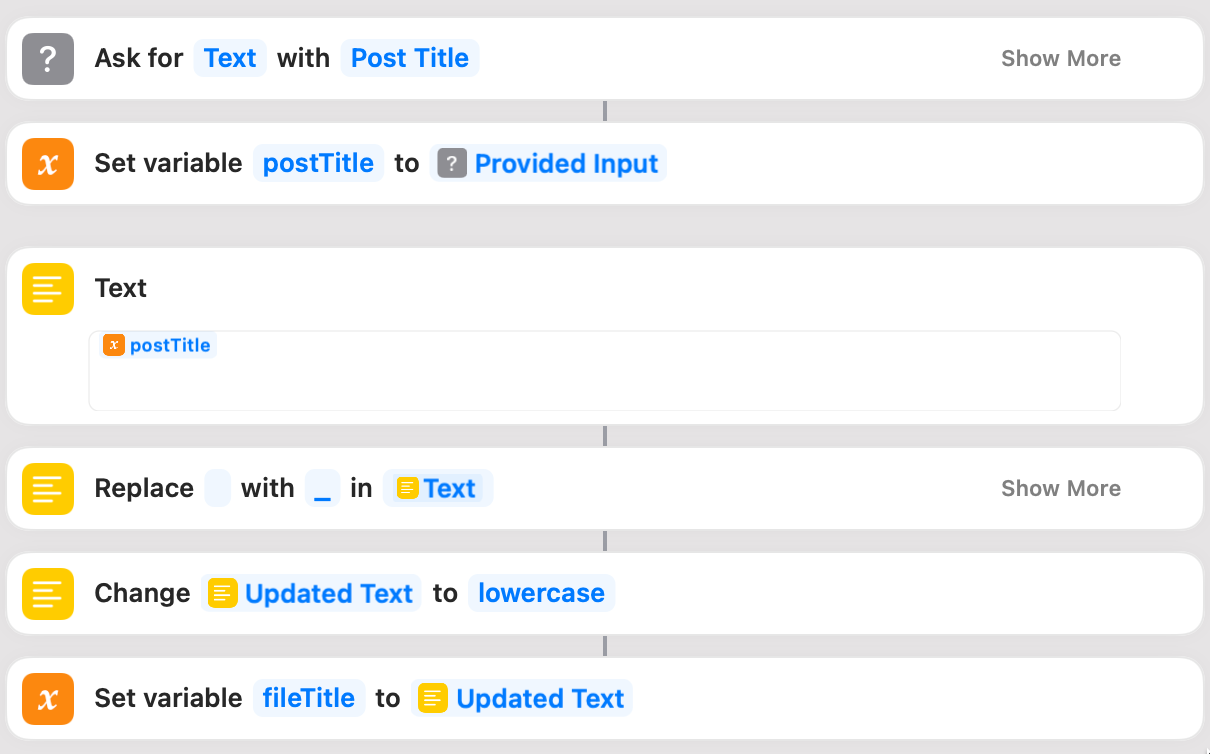
Our Shortcut begins by asking us what our Post Title will be. We take our Post Title and store that as the postTitle variable, and then we replace the white spaces with underscores and store that as a new variable, fileTitle, which will be used to name our file later.

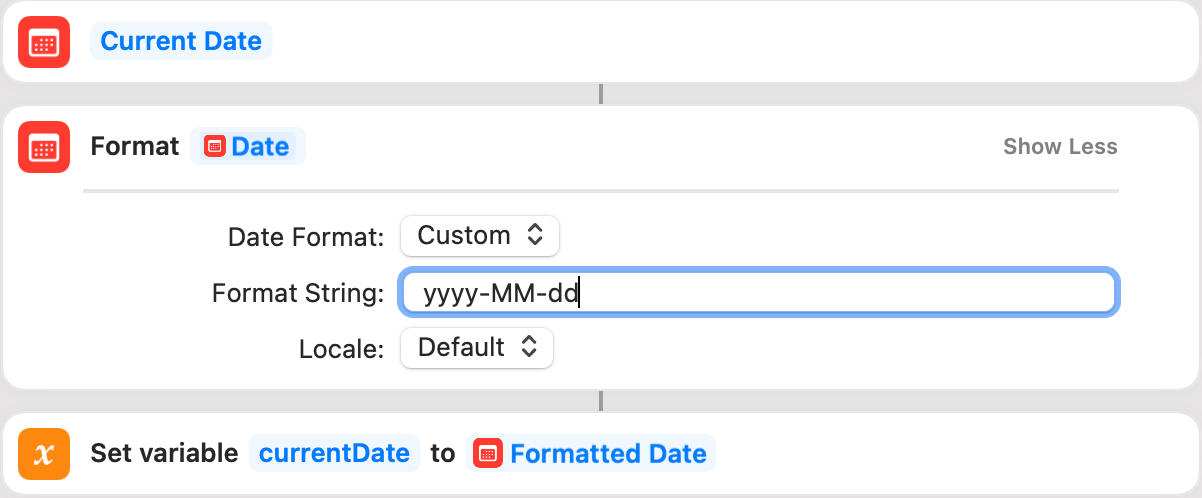
Next up, we capture the current date and reformat that, storing it as a new variable. You have multiple ways of formatting the date based upon your preference. I’ve used the yyyy-MM-dd format.

One last variable: the author’s name. I added this so that I can make this shortcut easily shareable.

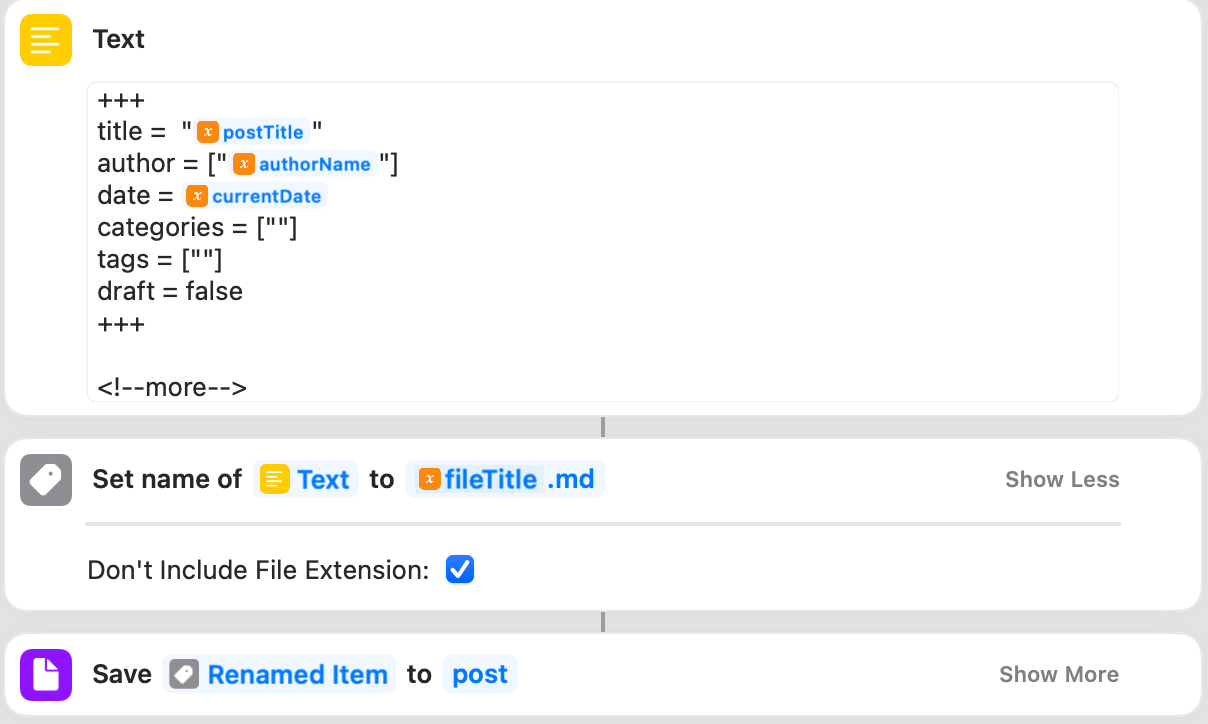
Now, we’re going to set up the Hugo post data and create a markdown file. We do so by loading a Text element with our pertinent data. You’ll see we’ve called the postTitle and currentDate variables. We then use the fileTitle variable to set the name of the file we wish to create. It’s important in this step to check the box for Don't Include File Extension or your file may be appended with .txt.

It’s this stage that created some weird issues for me. My buddy Drew was able to use the Append file function, but in my case I had to use this function to set up and save the file. You may need to use some trial and error to determine what works best for you. Now, we save that Renamed Item as a file in the directory where our Hugo blog posts live; usually /content/post. I’m storing my blog as a git repo on my iCloud Drive which allows for instant syncing across my devices as well as version control.
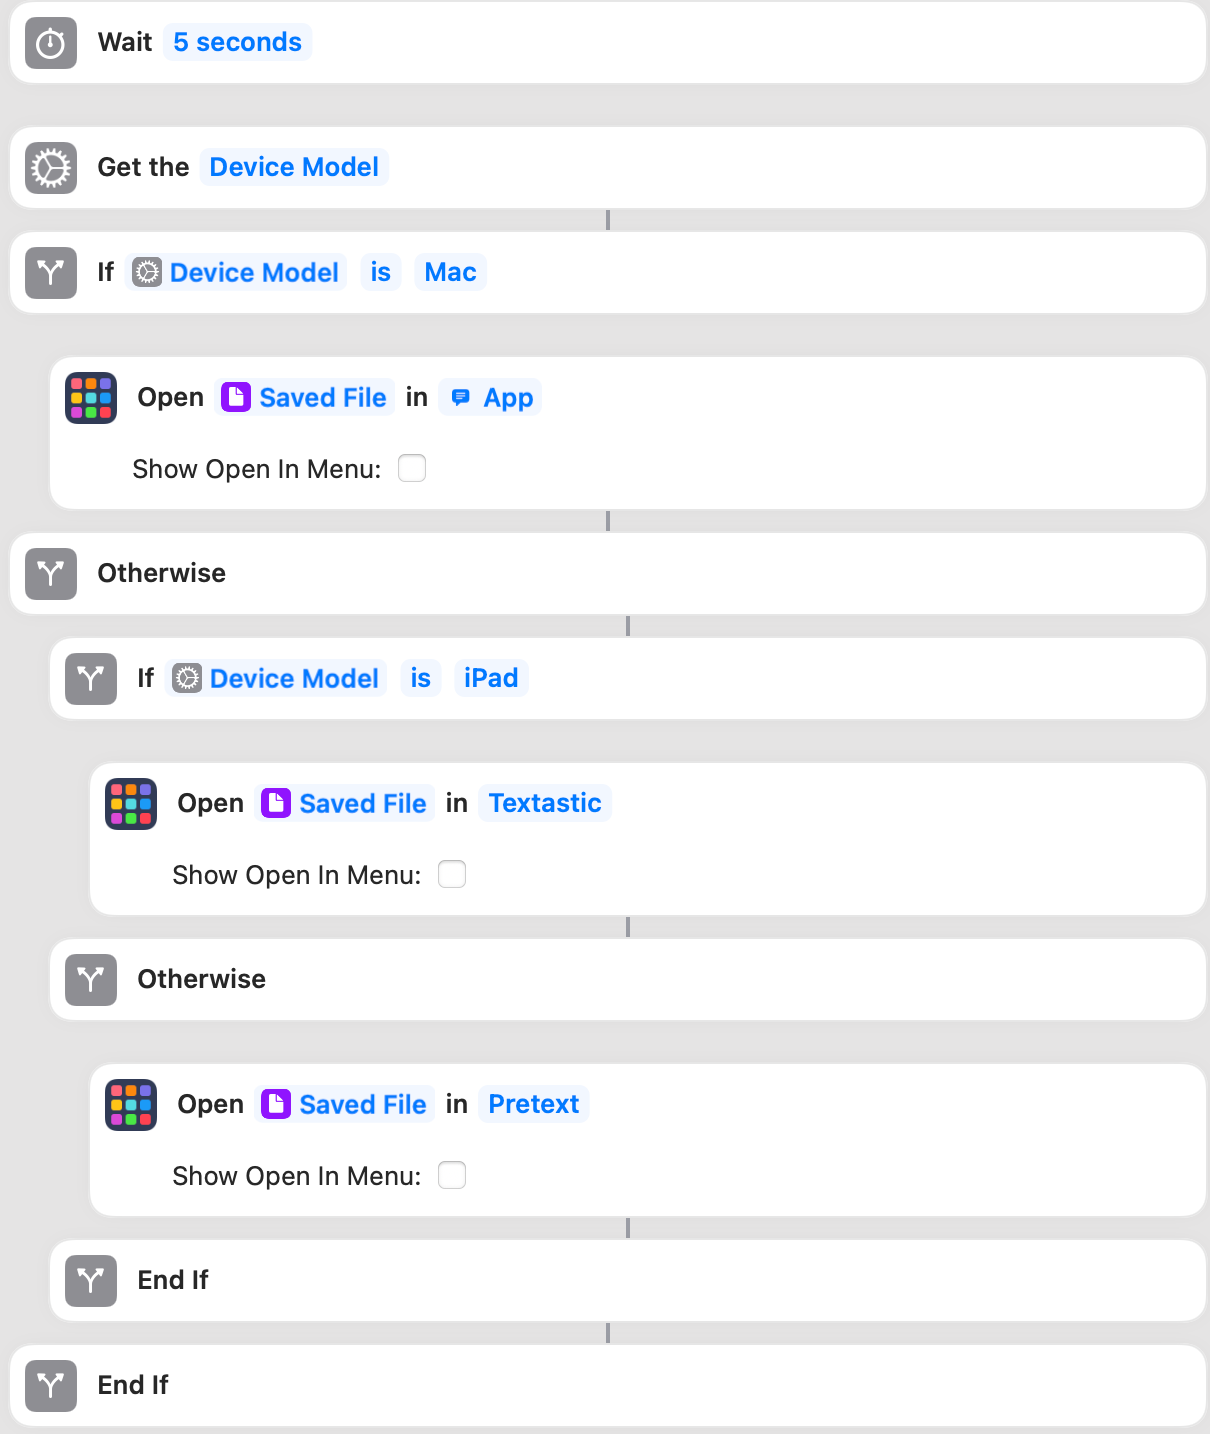
Now comes the fun part. We’re going to grab our Device Model and run an If loop to determine what device we’re using and which program to open our new file with.

In my case I have two If statements: if I’m on a Mac, ask me which app to open the file with because I’m undecided on a default, or if I’m on my iPad open the file with Textastic. Otherwise, this is assuming I would be on my iPhone, open the file with Pretext.
Obviously you can choose your own applications, and the order of your If statement is likely subjective.
The end result is a prepared markdown file that you can start editing immediately for your next blog post. There’s room for improvement, but this is a solid start.
Next time, I’ll run through the very quick GitHub Actions workflow that I use to trigger a Hugo deploy to S3/Cloudfront once I’ve pushed the new post to my private GitHub repo.
